|
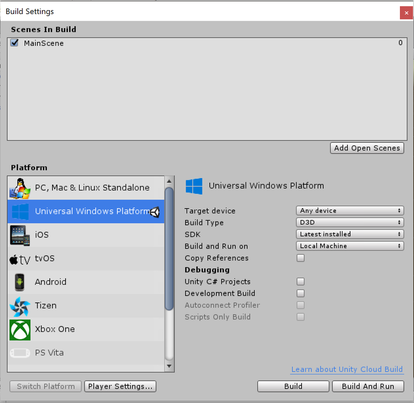
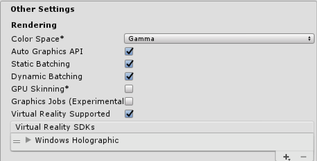
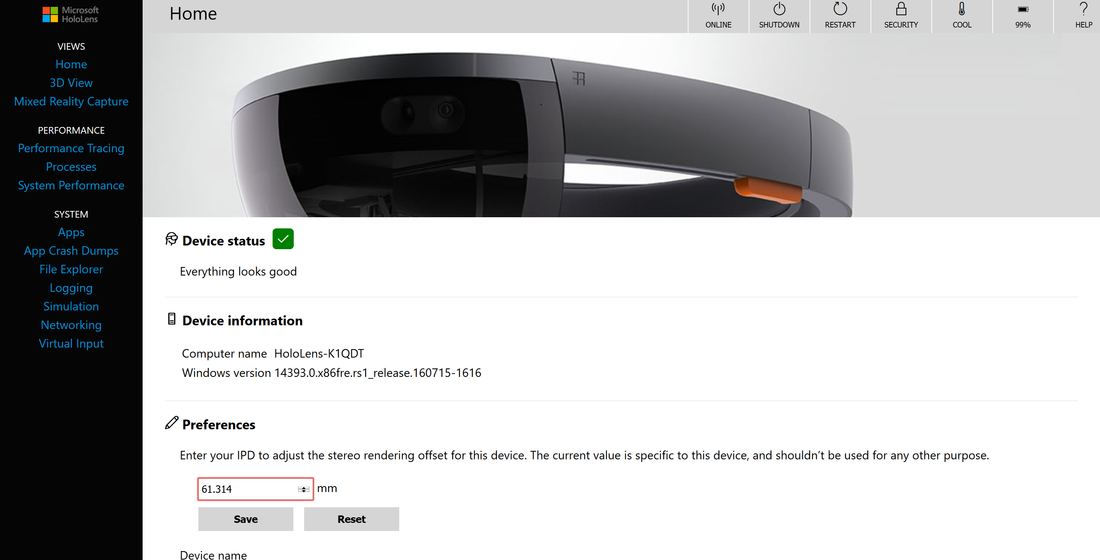
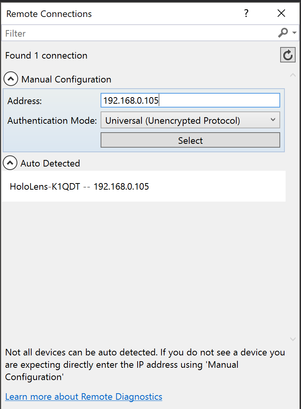
Now that we have successfully created our first Hololens application, we need to load it onto the Hololens and try it out real time. There are various steps in this process, starting from applying settings in Unity to building the application onto the device using Visual Studio. Getting the project ready in Unity Under the HoloToolkit menu, click Configure→Apply Hololens Project Settings. A popup menu will display a list of selectable settings. Select all of them and hit Apply. Unity will prompt you to reload your project in order for the changes to take effect. This is a one-time thing for any new project. Once Unity has restarted, click File→Build Settings. Click on Add Open Scenes to add your main scene to the build menu. Make sure that the platform selected is Universal Windows Platform. The settings in the image below are what you need: Before we click Build, click on Player Settings. In the Inspector menu, click Publishing Settings→Capabilities. Make sure Microphone, SpatialPerception, and Bluetooth (in case you are using the Clicker accessory) are selected. In the Inspector menu, click Other Settings. Make sure Virtual Reality Supported is selected and Windows Holographic shows up under Virtual Reality SDKs. Now we are ready to click Build in the Build Settings window. A File Explorer window will popup, prompting you to save the build location. The consensus here seems to be to create a new folder called App and selecting this folder for your build. Connecting to your Hololens The first thing to do when turning on and logging into your Hololens is to enable developers mode. Go to Settings→Update and Security→For developers. Turn developer mode on. This will prompt you to enter a username and password to access your device remotely. Under the Paired devices menu, click on Pair. This will open a prompt with a PIN that is required when first pairing with the device. On the same page, under Device Portal, enable remote management of the device. We will be deploying our Hololens app via WiFi, so go ahead and get the IP address of your device from Settings→Network and Internet→Wi-Fi. Click on Advanced Options and record your IPv4 address. Mine is 192.168.0.105. Make sure that your Hololens is able to talk to your PC by opening a new browser window on your PC and navigating to https://192.168.0.105 (replace this with the IPv4 address you recorded above). If all goes well, you should see this page: Deploying the application The device has been paired to your PC and the project is ready for deployment. In a File Explorer menu, navigate to the App folder you created for your project and double click on the .sln file. This will open Visual Studio 2017. Under the menu, you will see the following deployment options: Make sure you have selected x86 as the Solutions Platform and Remote Machine as the location of the machine you wish to deploy your app. Selecting Remote Machine will open another prompt asking you to find the Hololens device. You can either manually enter the IP address under Manual Configuration or let VS17 auto detect the device. Hit the Play button for Remote Machine.
Deployment can take a while, depending on the size of your application. Sometimes, VS17 will prompt you to enter a PIN to establish connection with the device. Enter the PIN you saved when clicking on Pair, under settings in the Hololens. Once the app has been successfully deployed, VS17 will display Ready at the bottom of the screen. Enjoy!
0 Comments
Leave a Reply. |
Archives
December 2018
Categories
|


 RSS Feed
