|
One of the most elegant features of the Hololens is that, basically, you are the cursor. Looking at a holographic object is equivalent to moving your mouse cursor to point. In this post, we will develop a simple script that utilizes the Gaze feature of the Hololens to perform certain actions on objects in the scene that we can interact with. Create a Script The HoloToolkit contains scripts and interfaces that allow us to use the Gaze feature of the Hololens. The interface that we will be using is the IFocusable interface, located in HoloToolkit→Input→Scripts→InputHandlers Pro Tip: Find any script by searching for it in the search bar in the Projects window. A list of scripts included in the Mixed Reality Toolkit can be found here. Let's open this up by double clicking it. It should launch Visual Studio 2017. The IFocusable script contains two empty functions, OnFocusEnter and OnFocusExit. The names of these functions give it away; one will be called when we gaze on the object, and the other will be called when the gaze is removed from the object. We will leverage this script in a new script that we will create for customized gaze actions. Back in Unity, under Assets, create a new folder called Scripts. This is the folder where we will place all our custom scripts. In this folder, create a C# script called GazeAction. Open it in Visual Studio. The empty script should look something like this: 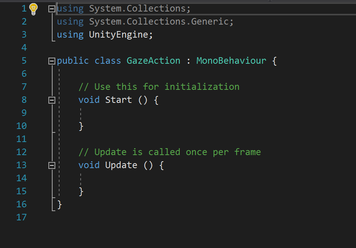 In order to use the functions from IFocusable, and for the InputManager to understand how to tie the gaze action to these functions, we need to inherit it in our custom script. We also need to import an additional interface - using HoloToolkit.Unity.InputModule - to our script. Gazing at the Object For this project, when we gaze at the sphere in our game, we want to change its color from Red to Blue. Create a new function public void OnFocusEnter(). In this function, we will first save the current color of the sphere. To access the color of the sphere, we need to get its Renderer component, as follows: var temp = this.gameObject.GetComponent<Renderer>( ); Here, gameObject refers to the specific game object that this script is attached to. Refer here for more information on GameObject class in Unity. Now, the current object color needs to be saved. Let's create a private variable in this script called originalColor. The variable is made private so that no outside function or object has access to it. The color can now be saved: originalColor = temp.material.color; The last thing left to do is to assign the object's color to another color. We can create a public Color variable called gazeColor and initialize it to a color of choice. In my case, I assigned it to Color.blue. The object's color when gazed on can be changed as follows: temp.material.color = gazeColor; Gaze removed from Object When the gaze is removed from the object, we want to assign it back to its original color. The code is similar to the above case: var temp = this.gameObject.GetComponent<Renderer>( ); temp.material.color = originalColor; The completed script looks like this: 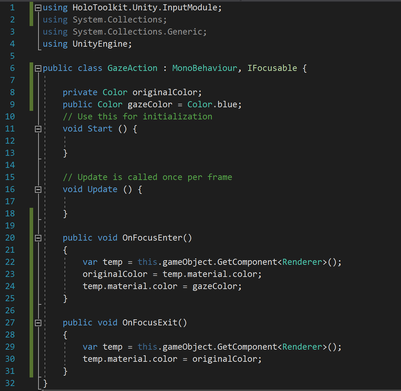 Assign Script actions to Game Object
Now that the script is done and saved, we have to assign it to the sphere in our project. In Unity, drag the script onto the sphere in the Hierarchy. If you now navigate to the Inspector menu, you will see the custom script appear. There is also a field for Gaze Color since we had made that public. If you do not like the color blue, you can change it to anything else from the Inspector panel. You do not need to edit your script to change the value of a public variable. Try your script out by entering the game mode (by clicking Play) and moving the cursor around with the arrow keys. If the cursor is focused on the object, it should change color (turn blue in my case). If the cursor is removed from the object, it should go back to its original color (red in my case). That's it! You developed your first Gaze action! Extra Credit: Try changing the color of the sphere to a random color whenever the user gazes at it. Hint here
1 Comment
Shaun McCarthy
8/2/2017 03:52:50 pm
Hi Leave a Reply. |
Archives
December 2018
Categories
|
 RSS Feed
