|
Update (3/20/2018): The name of the toolkit has changed from HoloToolKit to MixedRealityToolkit, following the 2017 Windows 10 Fall Creators' Update. Since most of my articles are older than that, HoloToolKit and MixedRealityToolkit can be used interchangeably. If you find any mistakes, please let me know and I'll fix it. After a bit of a struggle, I was finally able to install all the required tools to get started. I am using Unity 2017 (Personal edition), the latest version of the HoloToolkit pulled from the Git repository, and Visual Studio Professional 2017. Setting up your PC One of the first things you need to do in order to get started is to set up your PC in developer mode You can enable this by navigating to the following location: Settings → Update and Security → For developers Once here, enable the radio button feature "Developer mode" under Use developer features Accessing the HoloToolkit As mentioned in the previous page, the MixedRealityToolkit has all the essential hooks to enable you to get the most out of your Hololens device. It is a must have for developing any application that will utilize Gaze, Gestures, and Spatial mapping. There are many ways to incorporate the toolkit in your environment but this one worked well for me 1. Open Unity 2017 2. On the main page in the Projects section, click on Open. Navigate to the main Git synced folder MixedRealityToolkit-Unity and hit OK. Unity will ask you to save your new project. Go ahead and save it in your desired path and wait for the project to populate. 3. Once the project has been populated, Unity opens the project up in with the default view. 4. In the Projects window, you will see a folder titled Assets with a number of child folders. Select the parent folder. 5. Click on Assets → Export Package. Export everything to a Unity 3D package. I named mine MixedRealityToolkit_Package. Exporting this large project takes a few minutes. 6. Create a new Unity 3D project where you will be building your first mixed reality application. 7. Under Assets → Import Package, click on Custom Package. Select MixedRealityToolkit_Package and import everything. This takes a while with a couple of prompts from Unity asking you to confirm the contents of the package you wish to import. I selected everything. After a short while, you should have the MixedRealityToolkit package incorporated in your project. You will see a new menu item titled Mixed Reality Toolkit. Using the Essentials from the MixedRealityToolkit Now that the MixedRealityToolkit is part of your project, let's go ahead and create a New Scene (File → New Scene) Under Hierarchy, you will see the default Main Camera and Directional Light. Select them and delete them because we will be using prefabs from the MixedRealityToolkit instead. A new holographic scene can be setup up in one of two ways. The easy way is to set it up using the configuration options in the Mixed Reality Toolkit menu. Click on Configure → Apply Mixed Reality Project Settings and Apply Mixed Reality Scene Settings. Pro Tip: If you are developing apps for VR devices, make sure that "Target Occluded Devices" is selected when you apply the mixed reality project settings. The process can also be broken down into individual steps as shown below. Search for the MixedRealityCameraParent prefab (located in Assets → HoloToolkit → Input → Prefabs) and add it to the main Hierarchy. This adds the main camera to the scene. Add the DefaultCursor prefab (located in Assets → HoloToolkit → Input → Prefabs → Cursor) to the main Hierarchy. This adds the selection cursor to interact with holograms. Add the InputManager prefab (located in Assets → HoloToolkit → Input → Prefabs) to the main Hierarchy. This prefab handles all your UI callbacks. Make sure the DefaultCursor is an object in the Input Manager. You can check this by selecting Input Manager in the Hierarchy pane and looking at the Cursor option under Simple Single Pointer Selector in the Inspection pane. If the option is empty, drag the DefaultCursor from the Hierarchy to this field. Save your scene. All Done Your project should resemble the picture below. These steps are good enough to get you going in creating holograms for the Hololens. Enjoy! 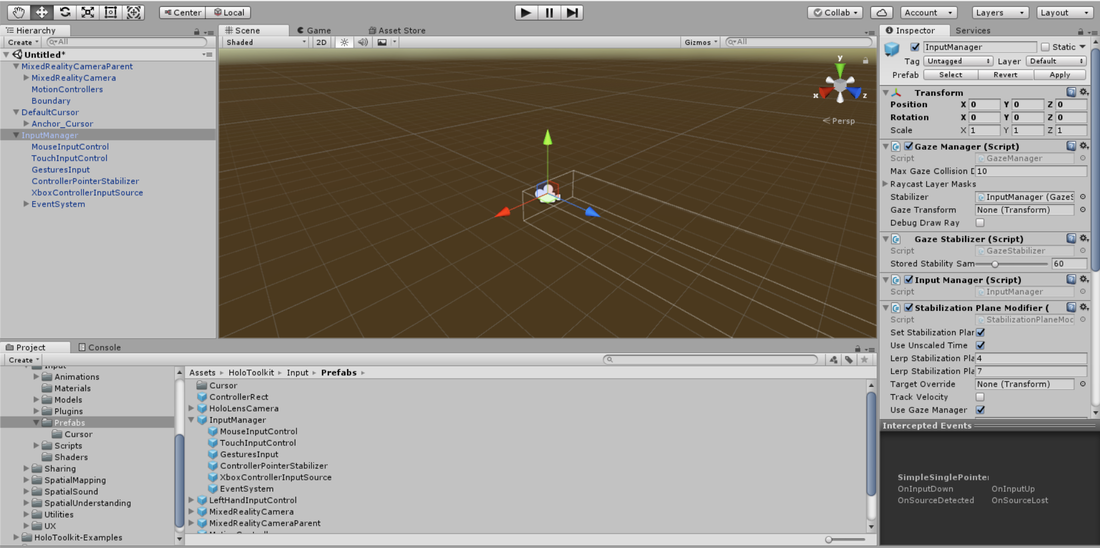
0 Comments
Leave a Reply. |
Archives
December 2018
Categories
|
 RSS Feed
